

How to Prepare Artwork for a Professional Patch Digitizing Provider
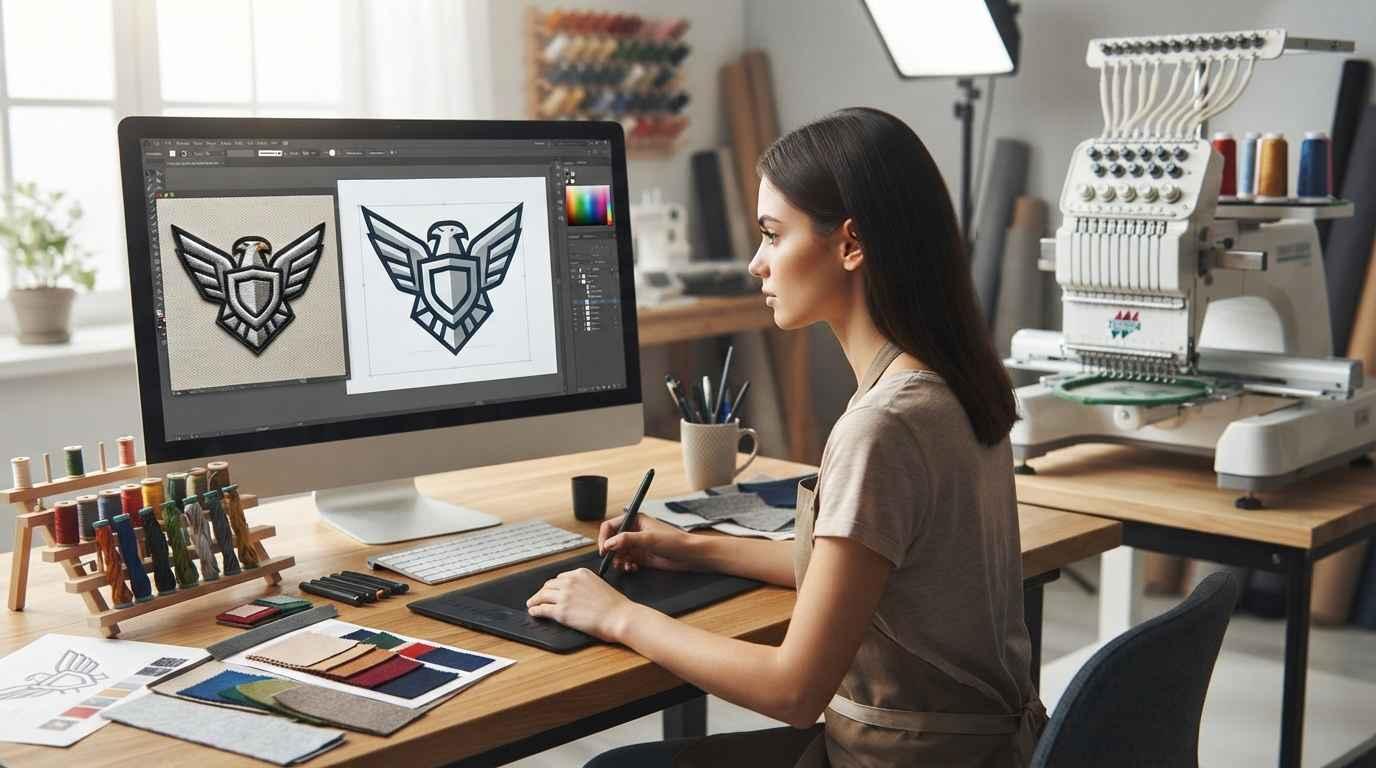
Preparing artwork correctly before sending it for embroidery conversion can make the digitizing process more efficient and accurate. When working with a professional patch digitizing provider, clear artwork and production information help the digitizer understand the intended design, patch size, colors, borders, and level of detail. Even when the original image is not perfectly prepared, providing as much useful information as possible can reduce uncertainty and make technical decisions easier.
Patch embroidery has different requirements from artwork prepared only for digital viewing or standard printing. Fine lines, tiny text, gradients, and complex shading may need to be simplified or adjusted before they can be represented effectively with stitches. Preparing the artwork with embroidery production in mind gives the digitizer a stronger starting point.
Why Artwork Preparation Matters for Patch Digitizing
A digitizer creates an embroidery file based on the artwork and the specifications provided. If important information is missing, the digitizer may need to make assumptions about size, colors, borders, or other elements.
For example, a logo may look excellent at a large size but become difficult to reproduce when reduced to a small patch. Thin lines can lose clarity, small letters can become difficult to read, and closely packed elements can merge during stitching.
Providing clear artwork and production requirements allows the digitizer to identify these challenges early and recommend practical adjustments.
Start With the Best Artwork Available
The quality of the original artwork can affect the digitizing process. Whenever possible, provide a high-resolution version of the design rather than a small screenshot or heavily compressed image.
Vector artwork can be particularly useful because shapes and outlines can often be examined more clearly. However, raster formats such as PNG, JPG, or other common image types can also be used as references.
If you only have a low-resolution image, send the original file rather than repeatedly saving and compressing it. A professional digitizer may be able to recreate or refine the artwork before converting it into an embroidery file.
Specify the Final Patch Size
One of the most important details to provide is the intended physical size of the patch.
Tell the provider the approximate width and height you need. If the patch will be used on different products at different sizes, mention those requirements as well.
Patch size directly affects how much detail can be included. A design that works at 10 inches may need significant adjustments when reduced to 2.5 inches.
The digitizer can use the requested dimensions to determine suitable stitch widths, text sizes, spacing, and border construction.
Mention the Intended Patch Shape
The patch shape should also be communicated before digitizing begins.
Common shapes include:
- Circle
- Rectangle
- Square
- Oval
- Shield
- Custom or irregular shapes
The outer shape affects how the border will be constructed. Irregular designs may require additional planning because the border needs to follow changing curves and angles.
If you already have a specific patch outline, include it with the artwork. If you are unsure about the best shape, explain how the patch will be used so the provider can assess suitable options.
Clearly Identify the Border
The border is an important part of a patch design, so indicate what you want around the outside of the artwork.
You may already have a border included in the artwork, or you may want the digitizer to create one based on the patch shape.
If you have a preferred border color, mention it. You should also specify whether the border should follow the exact artwork outline or a separate patch shape.
Clear instructions can prevent misunderstandings and help the digitizer plan the outer stitch structure appropriately.
Provide Accurate Color Information
Colors displayed on a computer screen can vary between devices, so it is helpful to provide specific color information when accuracy is important.
If your brand uses specific colors, include the relevant color references whenever possible. You can also identify thread colors if you already have a preferred embroidery thread range.
Keep in mind that thread does not reproduce every digital color exactly. Some colors may need to be matched to the closest available thread shade.
Providing clear color guidance gives the digitizer a better reference for creating the embroidery file.
Review Small Text Carefully
Small lettering can be one of the most challenging parts of patch embroidery.
Before submitting the artwork, check whether every word is necessary at the intended patch size. Very small letters may lose clarity once converted into stitches.
If the text is essential, tell the provider the minimum size or intended dimensions of the patch. The digitizer can then determine whether the lettering needs adjustment.
In some cases, increasing letter size, changing the font, or simplifying the wording may produce better embroidery results.
Avoid Unnecessary Fine Details
Not every detail visible in a digital image needs to remain in the embroidered patch.
Tiny lines, intricate textures, subtle shadows, and very small decorative elements may not reproduce effectively at a limited physical size.
Before sending the artwork, consider which elements are essential to the design. If a detail is important to the identity of the logo, tell the digitizer so it can receive appropriate attention.
Simplifying unnecessary details can make the final embroidery cleaner and easier to reproduce.
Explain How the Patch Will Be Used
The intended application can influence digitizing decisions.
Tell the provider whether the patch will be used on:
- Jackets
- Hats
- Bags
- Uniforms
- Workwear
- Sports clothing
- Accessories
Different products may involve different fabric types, embroidery areas, and production conditions.
For example, a design intended for a cap may require different planning from one intended for a large jacket patch. Providing this information helps the digitizer understand the production environment.
Mention the Patch Material
If you already know what material will be used, provide that information.
Common patch materials can include twill, felt, canvas, denim, and other fabrics. Each material can respond differently to embroidery.
Material information can help the digitizer make more appropriate decisions about stitch density, underlay, coverage, and other technical elements.
If you have not selected the material yet, simply tell the provider. They may be able to explain which considerations matter for the selected design.
Send the Original Logo or Design When Possible
If your artwork has been modified several times, try to provide the original version alongside the latest version.
This can help clarify which elements belong to the original design and which changes were made for a particular application.
For brand logos, providing official artwork can also help prevent accidental changes to proportions, lettering, or colors.
Do Not Flatten Important Information Without a Reference
Some artwork files contain separate layers for text, shapes, backgrounds, and other elements. If you have access to the layered original, keeping it available can be useful.
However, you should not worry if your artwork is already flattened. A professional digitizer can often work from a flattened image.
The important point is to provide the clearest version available and explain anything that may not be obvious from the image itself.
Explain Which Elements Must Remain Unchanged
If certain parts of the design must remain exactly as they are, identify them clearly.
For example, you may need a company logo, established lettering, emblem, or specific symbol to remain unchanged.
At the same time, explain which areas can be simplified if necessary for embroidery. This gives the digitizer a better understanding of where creative or technical adjustments are acceptable.
Mention Your Required Embroidery File Format
Different embroidery machines and workflows use different file formats. If you already know the required format, provide it when submitting the artwork.
Common embroidery formats include DST, PES, EXP, JEF, and others.
The artwork itself is not the embroidery file. The digitizer converts the visual design into a machine-readable format based on the requirements of the intended embroidery system.
Providing the required format early can help prevent delays later in the process.
Tell the Provider About Your Embroidery Machine
If you know the machine brand or model that will be used, share that information.
Machine requirements can vary, and some production environments may have specific file or formatting requirements.
If you are ordering a design for another embroidery company or production facility, ask them which file format and specifications they require before sending the artwork for digitizing.
Set Clear Expectations for Detail
Not every patch needs the same level of detail.
A simple logo may only require a few thread colors and basic shapes. A detailed emblem may require more careful stitch planning and potentially some artwork simplification.
When submitting your artwork, explain whether your priority is maximum detail, readability at a small size, production efficiency, or close reproduction of the original artwork.
This gives the digitizer useful context when making technical decisions.
Check the Artwork Before Sending It
Take a final look at the artwork before submitting it.
Check that the logo is complete, text is correct, colors are identified, and no important elements are missing. If the artwork contains spelling, review every word carefully.
It is much easier to correct an artwork error before digitizing than after the embroidery file has already been created and tested.
Provide Written Instructions Alongside the Artwork
Even clear artwork may not communicate every production requirement.
A short written instruction can explain:
- Final patch size
- Preferred patch shape
- Border requirements
- Thread colors
- Required file format
- Intended material
- Intended application
- Important elements that must remain unchanged
These details give the digitizer additional context and reduce the possibility of misunderstanding.
Ask About Artwork Adjustments Before Digitizing
Sometimes the artwork needs modification before it can be digitized effectively.
Ask the provider whether the supplied design requires cleanup, resizing, simplification, or other preparation.
This is particularly useful when working with low-resolution logos, screenshots, photographs, or artwork containing very small details.
Understanding these requirements before production can help you avoid unexpected changes later.
Review the Digitizing Proof or Preview
If a preview is provided, examine it carefully before approving the final file.
Look at the overall shape, lettering, colors, border, and placement of important elements. Remember that a digital embroidery preview may not look identical to a physical sew-out.
If something appears different from your original instructions, ask for clarification before production.
Allow Room for Professional Recommendations
Preparing artwork does not mean every decision has to be made by the customer.
A professional digitizer may recommend changing a small element, adjusting the border, simplifying lettering, or modifying stitch construction based on the intended patch size.
These recommendations are often related to embroidery limitations rather than changes to the brand identity.
Good communication allows the customer and digitizer to agree on practical adjustments before the final file is produced.
Common Artwork Preparation Mistakes
Several mistakes can make the digitizing process more difficult.
Sending only a tiny screenshot, failing to provide the intended patch size, omitting color information, or not mentioning the required file format can create unnecessary uncertainty.
Another common issue is expecting every small detail from a large digital logo to remain unchanged when the design is reduced to a small patch.
Preparing the artwork with the final physical application in mind helps avoid many of these problems.
A Simple Artwork Submission Checklist
Before sending your design, make sure you have considered the final size, shape, border, colors, material, application, and file format.
Also check the spelling and make sure the artwork includes the latest approved version of the logo or design.
If you are unsure about any technical requirement, mention it rather than making an assumption. Clear communication gives the digitizer an opportunity to recommend a suitable solution.
Conclusion
Good artwork preparation gives a digitizer the information needed to create a practical embroidery file. Clear artwork, accurate dimensions, defined colors, appropriate patch shape, border instructions, material information, and production requirements can all contribute to a smoother workflow.
The goal is not to make the artwork technically perfect before submission. Instead, provide the clearest design and the most useful production information available. A professional patch digitizing provider can then evaluate the artwork, identify potential embroidery limitations, and make appropriate technical adjustments.
For customers who need help preparing embroidery-ready artwork and converting designs into usable patch files, idigitize can be considered as part of the digitizing workflow.
FAQs
Q1. What artwork format is best for patch digitizing?
High-resolution artwork is generally preferable. Vector files can be especially useful, but clear PNG, JPG, and other image formats can also work as references.
Q2. Should I provide the exact patch size?
Yes. The intended physical size is important because it affects stitch width, text readability, spacing, density, and the amount of detail that can be reproduced.
Q3. Do I need to create the patch border myself?
Not necessarily. You can provide your preferred border or ask the digitizing provider to recommend a suitable border based on your artwork and patch requirements.
Q4. What should I do if my artwork is low resolution?
Send the best original version you have and explain that the file is low resolution. The provider may be able to clean up or recreate the artwork before digitizing.
Q5. Should I tell the digitizer what fabric I will use?
Yes, if you know it. Information about the patch or garment material can help the digitizer make more suitable technical decisions.
Q6. Can small text be included in a patch?
Small text can be challenging because embroidery has physical size limitations. The digitizer can assess whether the lettering is practical at the requested patch dimensions.
Q7. Why do I need to specify the embroidery file format?
The required format depends on the embroidery machine and production workflow. Providing it in advance helps ensure the completed file is suitable for its intended use.
 Romaian
 English
 Arabic
 French
 Spanish
 Portuguese
 Deutsch
 Turkish
 Dutch
Dutch
 Italiano
 Russian
 Portuguese (Brazil)
 Greek
Greek